Monthly Archives: November 2012

Balsamic Chicken With Pan-Roasted Tomatoes

One look at my blog will tell you I like balsamic vinegar! I really can’t get enough of the stuff. In fact, I am an all around vinegar lover. I use it to clean my floors, brighten my laundry, and get stains out of my carpets. So when I discovered this rich cousin of distilled white vinegar, I was more than thrilled. Always looking for more ways to add a pucker to my palate, I devised this delicious recipe. It is truly scrumptious- and good for you too!

You Will Need:

  • 1lb boneless chicken thighs
  • Preferred cooking oil
  • Salt and pepper to taste
  • 1/4 c balsamic vinegar
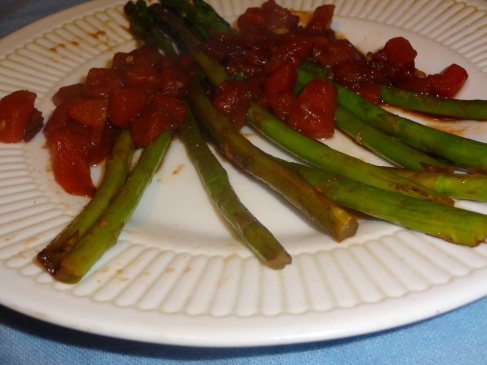
  • 2 medium ripe tomatoes, may substitute canned if necessary

Procedure:

  1. Heat a splash of oil in a medium nonstick skillet. Arrange the chicken thighs so that they are laid out completely, not folded over as boneless thighs tend to be.
  2. Sear chicken on each side until golden brown. About 5 minutes per side. Chicken may not be cooked through– this is okay.
  3. Season to taste, then layer pan with sliced ripe tomatoes.
  4. Add balsamic vinegar and a small amount of water. Reduce heat to medium-low. Spoon sauce over chicken as it finishes cooking.
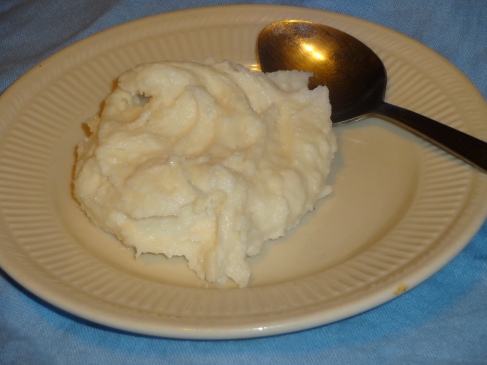
  5. Allow the sauce to reduce, adding more water as needed. Sauce should be fairly thick. Serve hot alongside rice and enjoy!

Un-Cajun Meat Pies

Image

Mmm, Southern comfort food! I originally planned to make traditional Louisiana Natchitoches meat pies. Unfortunately, my bell peppers had spoiled and I only had ground beef. Needless to say, I improvised. Nonetheless, the end result was delicious!

You Will Need:

  • 2 TBSP cooking oil of choice
  • 1 1/2 lbs ground beef
  • 1 yellow onion, diced
  • 2 stalks celery, sliced
  • 3 carrots, chopped
  • 3 small white potatoes, diced
  • 1 TBSP minced garlic
  • 3 TBSP A1 sauce
  • Salt and pepper to taste
  • Cajun seasoning (optional)
  • Pre-packaged pie crust*

Procedure:

  1. Heat oil in a medium to large skillet. Add all chopped vegetables, excluding garlic. Saute until vegetables are tender- potatoes will be slightly underdone.
  2. Add garlic and continue cooking. At this time, add ground beef. Cook through over medium-high heat, crumbling ground beef as it cooks.
  3. Add seasonings, including A1. Turn heat down to medium-low, allowing meat mix to continue simmering for approximately 20 minutes, stirring occasionally to prevent sticking. You may need to add a small amount of water or beef broth.
  4. Remove from heat. Allow the pie filling to cool completely. This takes 30 minutes to an hour.
  5. Roll out pie crust. Cut in half. Place each half of the pie crust on a greased cookie sheet.
  6. Scoop spoonfuls of the filling into the piecrust until it is approximately 2/3 full. Fold over the dough and press edges together to make a sort of dumpling or empanada. Repeat this for the following portions of pie crust.
  7. Bake at 350 degrees for 45 minutes, or until crust is golden brown. Serve alongside a green salad. Enjoy!

*NOTE- You can, of course, make your own pie crust. For convenience’s sake, I chose to use a pre-made crust. Many pre-made crusts contains allergens such as soy. Be sure to read the ingredients closely. I had good luck with a store brand that used canola oil in place of soy, making the crust allergen free. What a find!

Seared Asparagus With Balsamic Tomatoes

Image

Asparagus is one of my all time favorite vegetables! Unfortunately, I’m the only person in my family who likes it. Despite this, I make some preparation of asparagus weekly. This particular recipe gets doubled and munched on for days– it’s just that good!

You Will Need:

  • 1lb fresh asparagus, ends trimmed
  • 2TBSP olive oil or coconut oil
  • 1 tsp salt
  • 1 cup diced tomatoes, fresh or canned
  • 1 TBSP minced garlic
  • 4TBSP balsamic vinegar
  • 3TBSP crumbled goat cheese (optional)

Procedure:

  1. Preheat pan to medium-high heat until oil is hot. Add asparagus.
  2. Cook asparagus until just tender, turning every 2 minutes to avoid charring. Add garlic and saute until browned.
  3. Add diced tomatoes and balsamic vinegar. Cook for an additional 2 minutes, or until vinegar begins to reduce.
  4. Season to taste and serve hot. Enjoy!

Kid-Friendly “Goulash”

Image

Goulash is one of those great dishes that you can get into just about any child, with modifications. It’s a cheap, budget friendly dish that I remember scarfing down as a kid. I worshiped it in all its cheesy glory then, and I remember it fondly now. Unfortunately, being unable to consume cheese, I figured goulash was just another meal I would probably never eat again. Until I came up with this dairy free version!

Please feel free to use whatever noodles you and your family prefer. Goulash is traditionally made with elbow macaroni, but my daughter feels that the ‘funny shape’ of the noodles makes the pasta taste weird. Ha! We make ours with Rigatoni instead. For a healthier version, use ground turkey.

You Will Need:

  • 2 Cups Noodles- Gluten free noodles can be used if you desire.
  • 3/4 pound ground beef
  • 3/4 pound mild bulk sausage or ground country sausage
  • 1 diced onion
  • 1 jar favorite spaghetti sauce*
  • 1/2 cup dairy free cheese, such as Daiya

Procedure:

  1. Crumble ground beef or turkey and sausage in skillet, cooking over medium high heat. Cook until completely browned.
  2. Add onion and then cook for 2-3 minutes longer until the meat begins to ‘crisp’ slightly. Remove from heat.
  3. Boil noodles in salted water until cooked through, about 7-10 minutes depending on the type of noodle used.
  4. Add the meat to the noodles and add pasta sauce. Stir to mix well. Add cheese.
  5. Heat over medium heat until the pasta is bubbly and the cheese is melted. Season to taste.

*NOTE- This is a great kid friendly recipe. If you don’t have a jarred pasta sauce you particularly enjoy, or you are allergic to an ingredient in pasta sauce, feel free to make your own. Sometimes I omit the pasta sauce and add tomato paste, water, and diced veggies in its place. This is a great way to get more vegetables into your little one. Additions like carrots, winter squash, zucchini, and diced tomatoes mesh well with this recipe.

Enjoy! If cooked to al-dente, this recipe also freezes well!

Vegan Buttercream Frosting

Image

What to top a vegan cake with but vegan buttercream frosting?! Vegan cake, you say? Never fear- we’ll get to that later! This basic buttercream recipe can easily be flavored with any choice of flavorings. On the other hand, you could make chocolate buttercream by adding several tablespoons of cocoa powder. For simplicity’s sake, I’ve included instructions for creating a subtle vanilla buttercream. 

You Will Need: 

  • 1 cup soy free shortening* 
  • 3+ cups powdered sugar
  • 2 tsp vanilla extract
  • 1/4 cup plain coconut milk

Procedure: 

  1. Whip the shortening in a bowl until creamy, then add sugar a little at a time, beating until fluffy. 
  2. Add extract and coconut milk, beating for another 5-7 minutes until fluffy


*NOTE- In a pinch that will completely ruin your diet, lard works too. I have used lard when soy-free shortening such as palm shortening was unavailable or out of budget. In this case, add a little more powdered sugar and 2 teaspoons of imitation butter flavor to enhance the flavor. 

Sinful Chocolate Fudge

Oh my goodness! I was totally bummed out about not being able to make or eat fudge this year. It’s usually a Christmas tradition for me! I was THRILLED when I was able to modify a traditional chocolate fudge recipe to suit my needs! I can’t wait to see if my holiday guests will be able to tell the difference!

You Will Need:

  • 1/2 cup Vanilla flavored almond or coconut milk
  • 1 1/4 cup white sugar
  • 1/4 cup soy-free margarine*
  • 1/2 cup Enjoy Life dairy free chocolate chips
  • 1 tsp vanilla extract

Preparation:

  1. Put alternative milk and sugar in a sauce pan. Heat over medium-high heat, stirring constantly. While you can use soy milk if you are not allergic, soy milk does tend to curdle when heated, so use extra caution here. Bring to a boil and, stirring frequently, boil for 7 minutes.
  2. Remove pan from heat, adding margarine, chocolate, and vanilla. Stir until margarine and chocolate melt and the mixture is smooth and creamy. Do not neglect the stirring, as the chocolate will burn!
  3. Pour into a greased 8×8 casserole dish. A smaller dish can be used to yield thicker pieces of fudge. We prefer them thin.
  4. Refrigerate overnight before cutting into squares**

*NOTE- I prefer Earth Balance’s soy-free margarine. Earth Balance Organic Coconut Spread also works well, but doesn’t have the same authentic butter flavor.

**NOTE- To change the flavor or add a festive feel to your fudge, crushed peppermints, crushed candy canes, chopped nuts, coconut, or any other holiday topping can be sprinkled over fudge. Press the toppings down gently so they set into the fudge a bit prior to serving.


Now that fudge is back on the menu for you, too, I urge you to watch your waistlines- this one’s bound to be addicting! Cheers, and happy eating!

How To Replace An Egg

If you’re allergic to eggs, you may fear that baked goods are totally forbidden to you. Fortunately, this is not the case! There are a variety of ways to replace an egg in most traditional recipes, and there are also several commercial egg replacers on the market. If you’re strapped for cash or don’t feel like running to the grocery store, here are some egg replacements that are likely already living in your cupboard!

  • 1/2 of a ripe, smashed banana
  • 1/4 cup apple sauce
  • Tofu*

Smashing bananas or adding applesauce are a great way to replace an egg in any baked good recipe, but don’t allow for the rising or fluffiness that traditional recipes get from eggs. If you use these substitutes and are looking for a fluffy or well-risen baked good, be sure to add a bit of baking soda or baking powder if the recipe doesn’t already call for it.

If you’re not up to experimentation, there are also several commercial egg replacers on the market. The most trusted brands are Ener-G Foods and Bob’s Red Mill. Personally, I always keep a box of Ener-G Foods Egg Replacer on hand. While it’s a bit pricey for a baking item, one box contains the equivalent of 100 eggs!

*NOTE- Tofu is a soy based ingredient. If you aren’t allergic to soy, it is a great alternative for eggs in many recipes, especially those that call for hard boiled or solid eggs. Silken tofu and crumbled regular tofu have a texture similar to hard boiled eggs, and with the addition of mustard or turmeric, can successfully fool your guests as well as your own palate!

Delightfully Creamy Creamed Spinach


Creamed spinach is back on the menu! This preparation yields a delicious, particularly creamy creamed spinach. I recommend avoiding omission of the garlic, as this increases the coconut flavor from the milk- one that I don’t find pairs particularly well with spinach. The garlic balances these flavors out nicely. I imagine this recipe would also work well with almond milk, perhaps with the addition of extra flour since almond milk is a bit thinner than coconut milk. If you happen to try it and make any modifications to this recipe, please be sure to let me know!

You Will Need:

  • 1 medium yellow onion, diced
  • 1lb fresh baby spinach
  • coconut oil, or preferred cooking oil
  • freshly minced garlic
  • salt and pepper to taste
  • 6-8oz coconut milk
  • 1-2TBSP all purpose flour

Preparation:

  1. Heat a small dollop of coconut oil in a large saucepan over medium-high heat. In this pan, cook the diced onion until soft and translucent. Stir in garlic and saute for 1-2 minutes, or until garlic begins to brown slightly. Do not burn the garlic!
  2. Stir in spinach, salt and pepper, and cook until spinach is completely wilted.
  3. Whisk 1-2TBSP of all purpose flour into chilled or room temperature coconut milk. Be sure to do this before adding the milk to the pan to avoid lumps. Whisk until blended smooth.
  4. Add coconut milk and flour mixture to the pan and bring to a boil, stirring constantly.
  5. Reduce heat to medium and simmer until the sauce has thickened considerably. About 3/4 of the sauce should evaporate.
  6. Enjoy!